Using and Customising the Key
What is the Colour Filter Key?
The Key or legend, is the list of the values and their assigned Appearance, that can remain visible while you navigate the 3D.
It also provides a shortcut to re-apply the associated Colour Filter in one click.
How do I Display the Key?
By default, the Colour Filter Key is automatically displayed when a Colour Filter is applied. You can also display the Key manually from the Colour Filters dialogue or the Colour Filter Configuration Dialogue.
Default Behaviour of the Key
The Key contains the list of all appearances defined for the Colour Filter.
When the corresponding options are activated, it also contains the appearance of the ignored values (identified as <Ignored> or <Other Values> by default) and the appearance of objects with multiple matches (identified as <Multiple Values>).

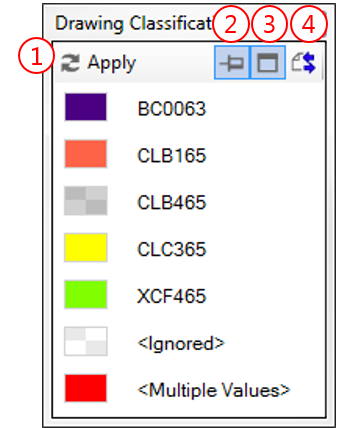
The Key gives you access to the following commands:
 Click Apply to re-apply the associated Colour Filter
 Activate the Pin option to force the Key to be visible on top of other windows
 Activate the Borders option to display the form borders
 Click the Save button to save the Key position and size to be restored the next time it is displayed
Customising the Key
The Colour Filter Assistant lets you modify how coloured values are displayed in the Key by renaming and/or hiding some values.
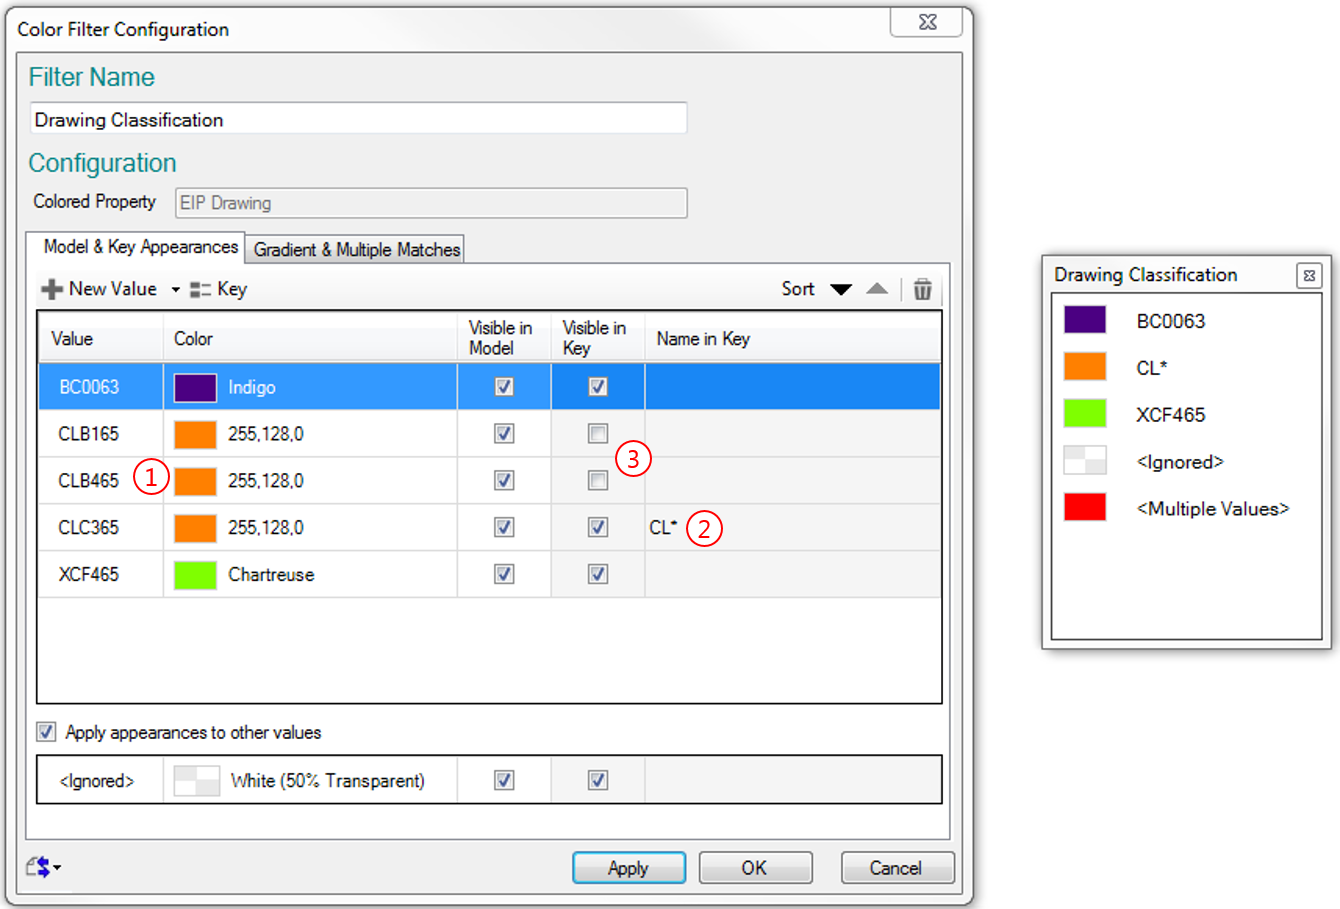
- To group the values with the same appearance under a single label:
 Give the same appearance to all values of the group,
 Change the Name in Key property of one value, and
 Set the Show in Key property of all other values to false

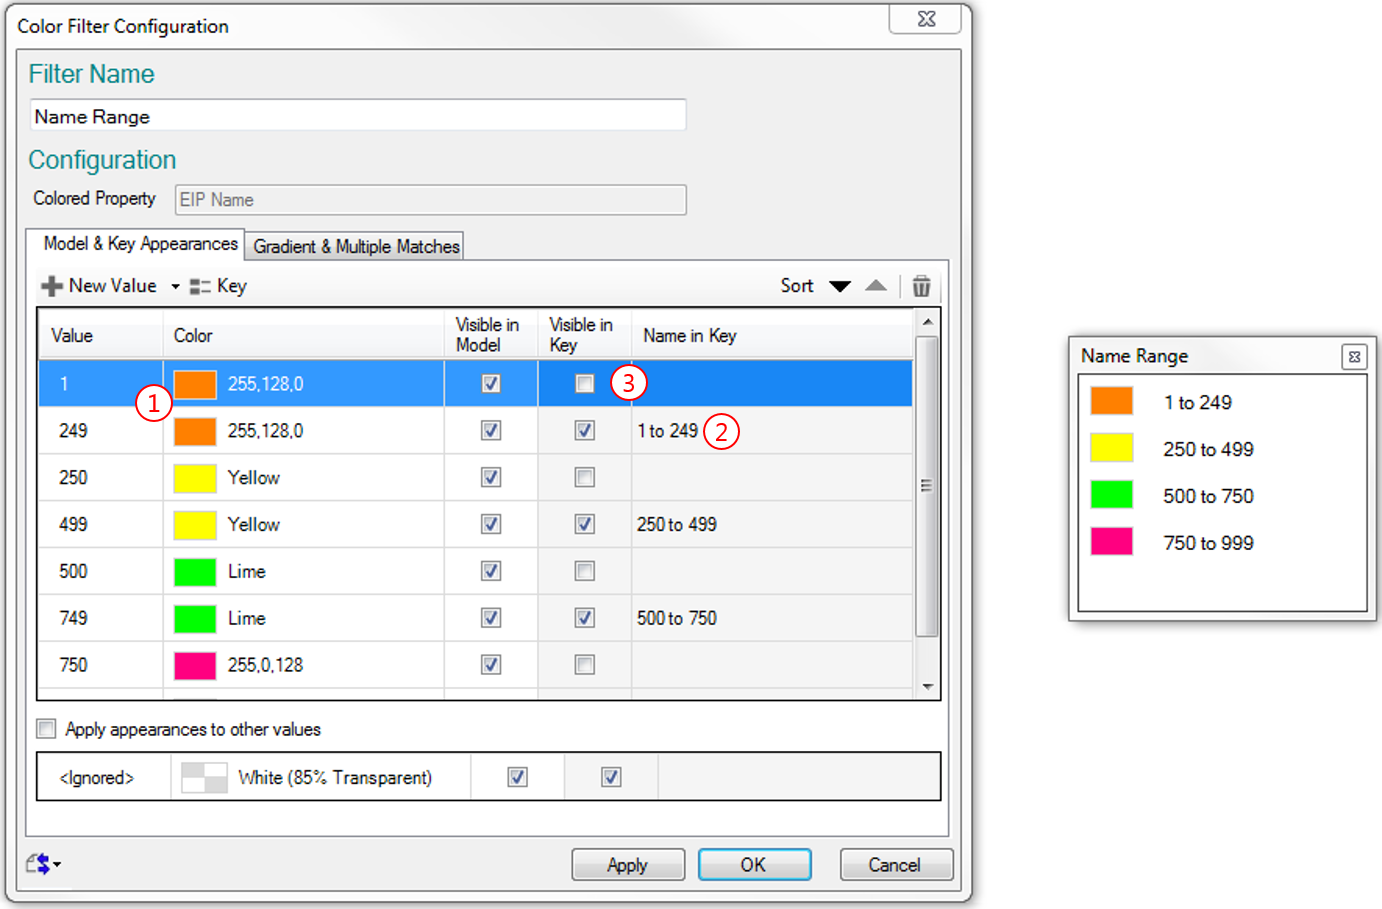
- Applying this same method when using the Gradient option to create ranges, you can group the boundaries values of each range:

|
|
If you want to save the Key's position and size in your Project (bsxp) or component (bsxc) files, use the Save Key Position & Size button, before you save the Project. |
|