Setup
Install the Desktop Client
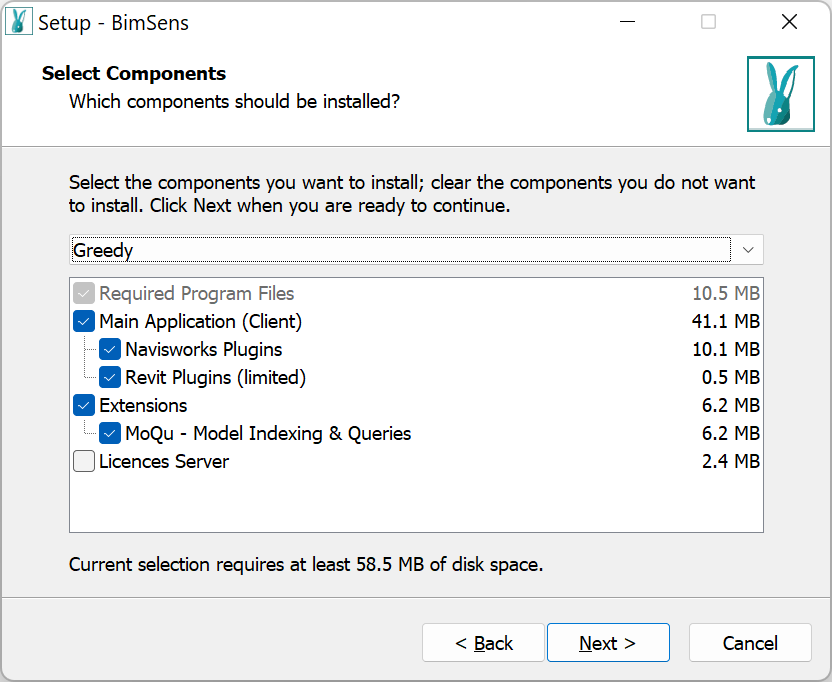
The MoQu Desktop Client is part of BIMSens installation. Select the option Extensions > MoQu
With the client application installed, let's now deploy a instance of the database, or Dumpster.
Deploy a New Dumpster
Once the installation is complete, navigate to C:\ProgramData\Autodesk\ApplicationPlugins\MoQu.bundle\<Version>\ and double click the programme MoQu.exe to launch the Dumpsters Configuration dialogue.
This dialogue is also available available in the Navisworks Index Explorer > Status bar > Edit Dumpsters.
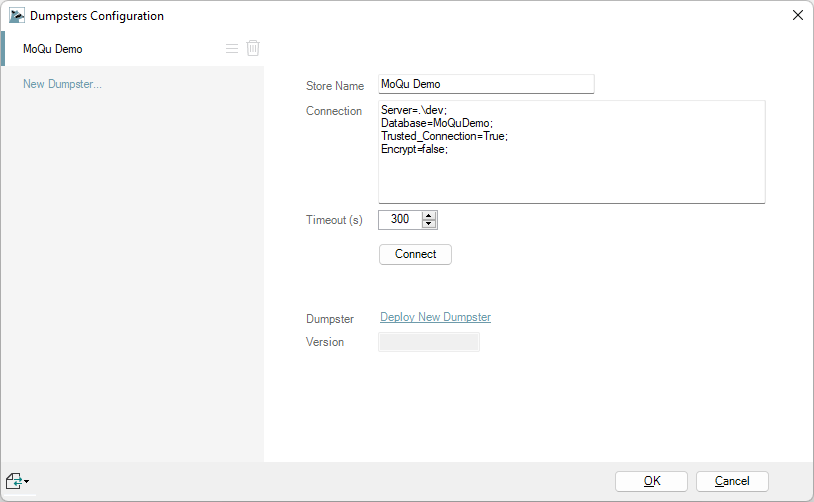
In the left panel, click the New Dumpster label to create a new Dumpster Configuration. Select the created Configuration, and use the right panel to type a Store Name and the Connection String for your host database of choice. For example (replace <value> with the appropriate values for your environment):
- SQL Server On-Premise:
Server=<ServerName>; e.g. localhost when using a local installation of SQL Server
Database=<Database Name>;
Trusted_Connection=True; To use Windows Login
Encrypt=False; True if using encryption, unlikely on local installation
- Azure SQL Database:
Server=<ServerName>; e.g. database url
Database=<Database Name>;
Authentication=Active Directory Interactive;
User Id=<user@domain.com>;
Encrypt=False;
Click Connect to test the connection and scan the database. Existing Dumpsters are loaded into the Dumpster drop down. If there are no existing dumpster, the label Deploy New Dumpster is displayed instead, with a prompt to create the first one. Accept the prompt or click the label.

In the Dumpster Creation dialogue, type a Prefix to differentiate this Dumpster from others in the same database and click Deploy.
|
|
|
|
|
The prefix is not mandatory if you are not planning to deploy more than one instance of MoQu to the same database, you may leave it blank. From scalability experience we recommend that you use a Project Name or Code as prefix to allow you to deploy independent instances for each project. |
Repeat the operation as many time as required to deploy more instances of the application (e.g. for multiple project or business units), and click Close, then OK, to exit.
|
|
|
|
|
We can chose to save the configurations to an external file shared between multiple users using the Import/Export button Conversely, IT admins can push the System environment variable MOQU_STORES_FILEPATH to a group of users who need to share configuration information. |

Connect BIMSens to the Dumpster
We now have a deployed instance of the database, which includes pre-configured Project and Repository. Several of the associated settings are placeholders, so let's review them to adapt to our environment.
Configuration changes are managed via the MoQu BIMSens App: C:\ProgramData\MoQu\MoQu_1.0.0.1.bsxp
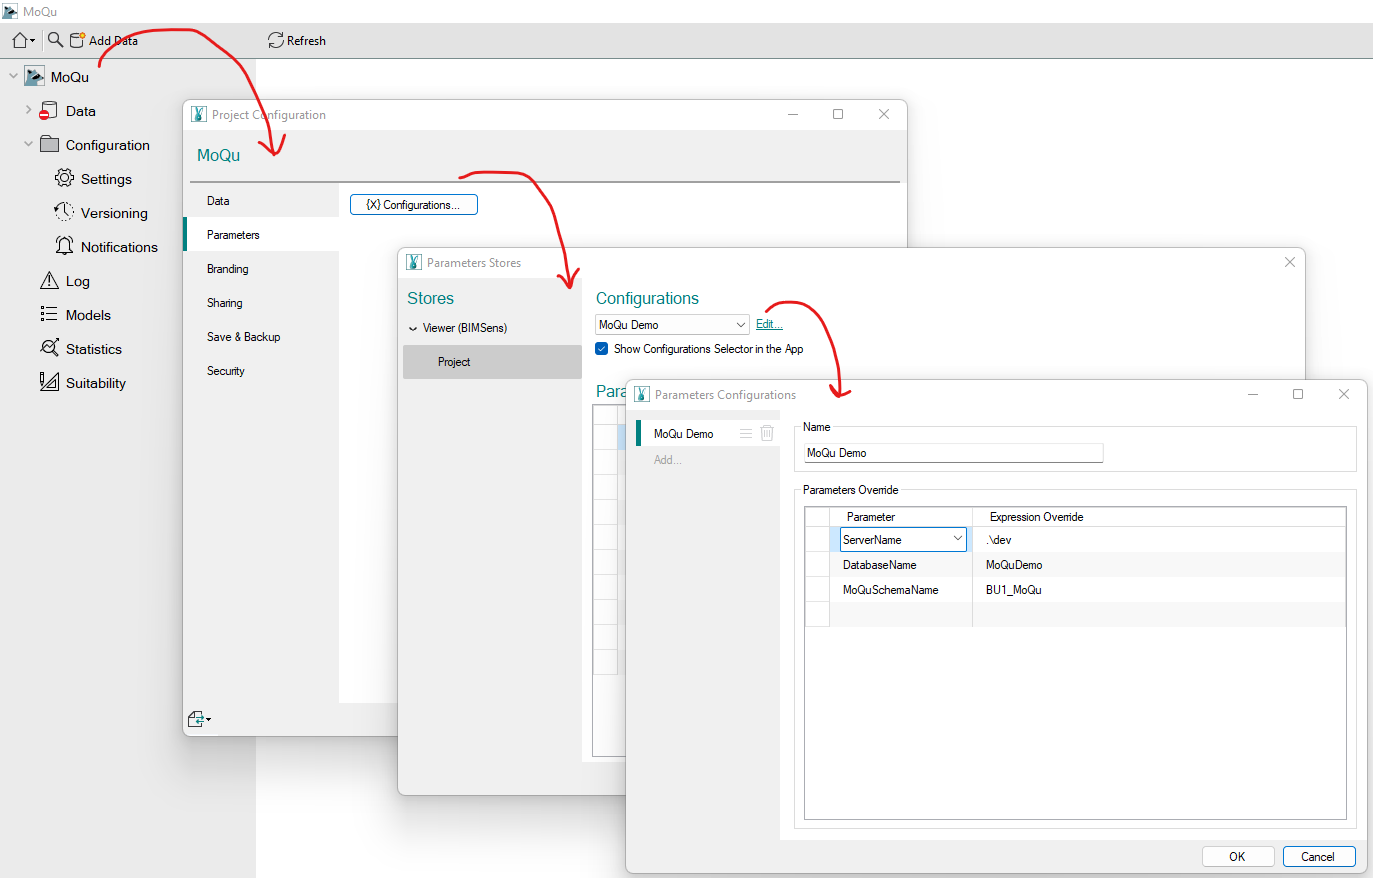
With a Developer licence, open the MoQu_<version>.bsxp app, right click the Project Node and select Configure.
Under Parameters click Configurations.
At the Project level click the Edit label on the right side of the Configurations drop down.
In the Parameters Configurations dialogue, delete the dummy examples and Add a new Configuration. Use the same Server and Database names as the MoQu Dumpster connection string, and use the MoQu Dumpster Name as MoQuSchemaName.
Close all the dialogues to return to the app.
BIMSens is now connected to our MoQu instance, and we can switch back to a Contributor licence for the rest of the configuration.
Next